How to Create Your Own Teacher and Student ID Cards
Did you know? Home educators are eligible for many of the discounts certified teachers receive. Yay! Who doesn’t like to save money? To qualify for these savings you must sign up for the store’s teacher rewards program and show proof of current homeschooling status. While many homeschool parents choose to use their Umbrella school’s letter of acceptance, or their Notice of Intent (NOI) presented to the school district, some families are creating ID cards. ID cards are smaller, can be laminated to last longer, and look more official. This blog will explain how to create an ID card of your own or, if you prefer where to purchase one online.
Okay, true confession time. I have never actually asked for an educator discount. Sad, I know. I have missed out on all sorts of savings, not because I didn’t have my letter – I carried the darn thing with me everywhere – BUT because I forgot to show it to the cashier (please tell me I am not alone here).
This year I resolved to take advantage of the discounts and freebies offered to homeschooling families. In an effort to assist my poor memory, I decided to create an official-looking teacher ID card to carry in my wallet. I figure if I see it next to my credit/debit cards I will remember to use it at checkout- we’ll see if my plan works!
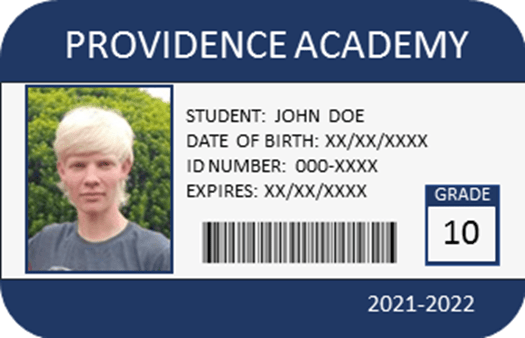
I created a student ID card for each of my kids as well. Student IDs can be used for access to special homeschool events, and to obtain entrance fee discounts at zoos, museums, and activity centers. While not essential, a photo ID is helpful for high school students as it can make obtaining a learner’s permit, banking, and gaining employment a bit easier.
So, how did I make our ID cards? Here are the basic steps I used and some ideas for what to include on your own cards.
- Choose a design software you are comfortable with such as Canva, Photoshop, or Inkscape (I used PowerPoint).
- Open a new project and re-size it to your desired dimensions. I used 3.5” wide x 2.25” high, approximately the size of a credit card.
- Title your project and save it to prevent losing your work. I recommend saving again after each change made, ‘just in case’. (Once you’ve lost a project, you will never have to be reminded to save your work frequently- ask me how I know!)
- Decide your cards shape- straight or rounded edges? Make the necessary alterations to your file.
- Decide on a color scheme. Create a colored background and add patterns or images as desired. If your school is fancy and has a logo, add it now.
- You will need a photo on the ID, so add this next. Before adding the photo to your design, crop it to size using a photo editor. Place the image on the right, left, or middle of your project leaving ample room for your text.
- Determine what informational text you will include. Here are some ideas to consider. I have starred the bare essentials:
*First and last name
*Cardholder’s status (Student or Teacher)
*Current school year
You may also wish to add one or more of the following:
- School name (can be as creative or as simple as you wish)
- City, county, and/or state of residence
- Umbrella association name, if using an umbrella school
- Homeschool or Umbrella association address
- Homeschool or Umbrella association phone number and/or email
- Umbrella or association account number, if applicable
- Cardholder’s birthdate
- Cardholder’s grade level (if student)
- Issued date – date when you begin
- Expiration date – one year from issue date, or when you anticipate completing your school year
- A “faux” barcode (makes it look more official). To create your own barcode search ‘free barcode generator’ in your web browser. Follow the instructions and download the completed file.
8. Add your text. Adjust the font and size, then position as desired.
9. Create and add your barcode, if desired, resizing as necessary. Barcode placement is usually near the bottom of the card, centered or on either the right or left side.
10. After you have placed your image and added your text, proofread your card. If possible, have someone else look it over as well, to spot any errors you may have missed.
11. Print your ID card. Send the file to a printing company or print it at home. I recommend using either photo paper for a shiny finish or use heavy weight paper such as cardstock for durability.
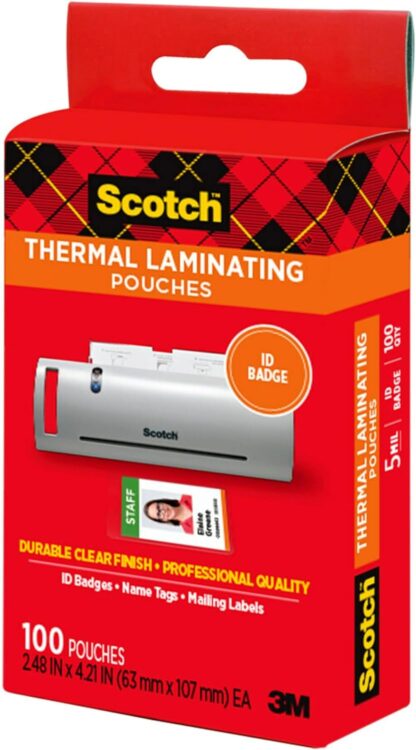
12. If desired, laminate your ID card. This step is optional but will extend its lifespan. If you do not own a laminator, some FedEx stores have one available for public use. Either bring your own laminating pouch or purchase one there. Ask a store employee for assistance if you are uncertain how to use the machine.
13. Cut out your ID card. If you laminated it, be sure to leave a small border around the printed page so it remains sealed.
14. Put it in your wallet and remember to use it!
The products below are affiliate links, I may receive compensation for purchases made using these links, at no additional cost to you.

If you do not have the time or inclination to create your own ID card, there are options to have one made for you. Several websites offer templates to quickly input your information. Some sites give the option of printing the cards yourself (for free) or to pay to have a PVC (laminate) copy shipped to your home. Please note, should you choose delivery it may take about 2-3 weeks for your card(s) to arrive.
If these methods interest you, here are some sites to consider using:
Etsy.com – Card prices and shipping times will vary depending on the store selected.
Discover K12 – The cost at the time of writing this blog is $14.95 per card.
Teachers Pay Teachers has several options for creating ID cards. (It’s also a great resource for worksheets, unit studies, and more! If you haven’t checked this site out, you are missing out!)
Homeschool Buyers Co-op. Signing up for their free membership grants you access to discounts on supplies and memberships. This site offers a free print-at-home option, or for $7.95 (price may change over time) a PVC laminate card will be shipped to your home. View the ID card template and sign up here.
HSLDA (Home School Legal Defense Association) offers their members ID cards for $9.99 each (price may change). Rush shipping is an additional $10.00. You can access this page here.
Big Huge Labs. This is a photo sharing and editing site. Only offers a print at home option, shipping of completed cards is not available. These ID cards include a barcode option. The ID card samples can be seen here.
Name Tag Wizard. According to the website, most orders are ready to ship the next day. There is no minimum and their prices are reasonable, between $6-$8.00 per card.
Zazzle.com. Price varies depending on product creator. Average price seems to be between $4-$5.00 per card.
One thing to note is these ID cards are not accepted everywhere. Some retailers require a teaching certificate to qualify for educator discounts.
Stores which will usually grant homeschool discounts include:
(Please check each store’s policy as restrictions may apply)
- Michaels Arts & Crafts Stores
- Joann’s
- Hobby Lobby
- Lakeshore Learning
- Barnes and Noble
- Staples
- Office Supply
- FedEx
- Books-A-Million
- Waldenbooks
- Half Price Books
- Borders
- Container Store
- Dollar Tree
- Restaurants
- Movie Theaters
- Zoos
The following stores offer discounts for back-to-school shopping or during teacher appreciation week:
- Target
- Walmart
- Big Lots
If you are aware of any additional homeschool discounts at retail stores, please share them (and your location) in the comments section below.